
Nothing says ‘Merry Christmas’ more than a Easy Polar Bear Mousse Cake! How adorable is this?!!
A fully vegan 2 ingredient, rich and creamy chocolate mousse, with a chewy brownie base, coated in dairy-free white chocolate, desiccated coconut with edible chocolate details.

This dessert is absolutely scrumptious, from the insanely creamy chocolate mousse, to the chewy chocolatey brownie. The flavours and textures work perfectly together!
I wanted to create a recipe which would be a real showstopper to present at your Christmas dinner table / gathering.
This dessert is super easy to make and extremely effective, with a 3D polar bear effect and every single decoration is edible (and 100% vegan, of course) – haha!
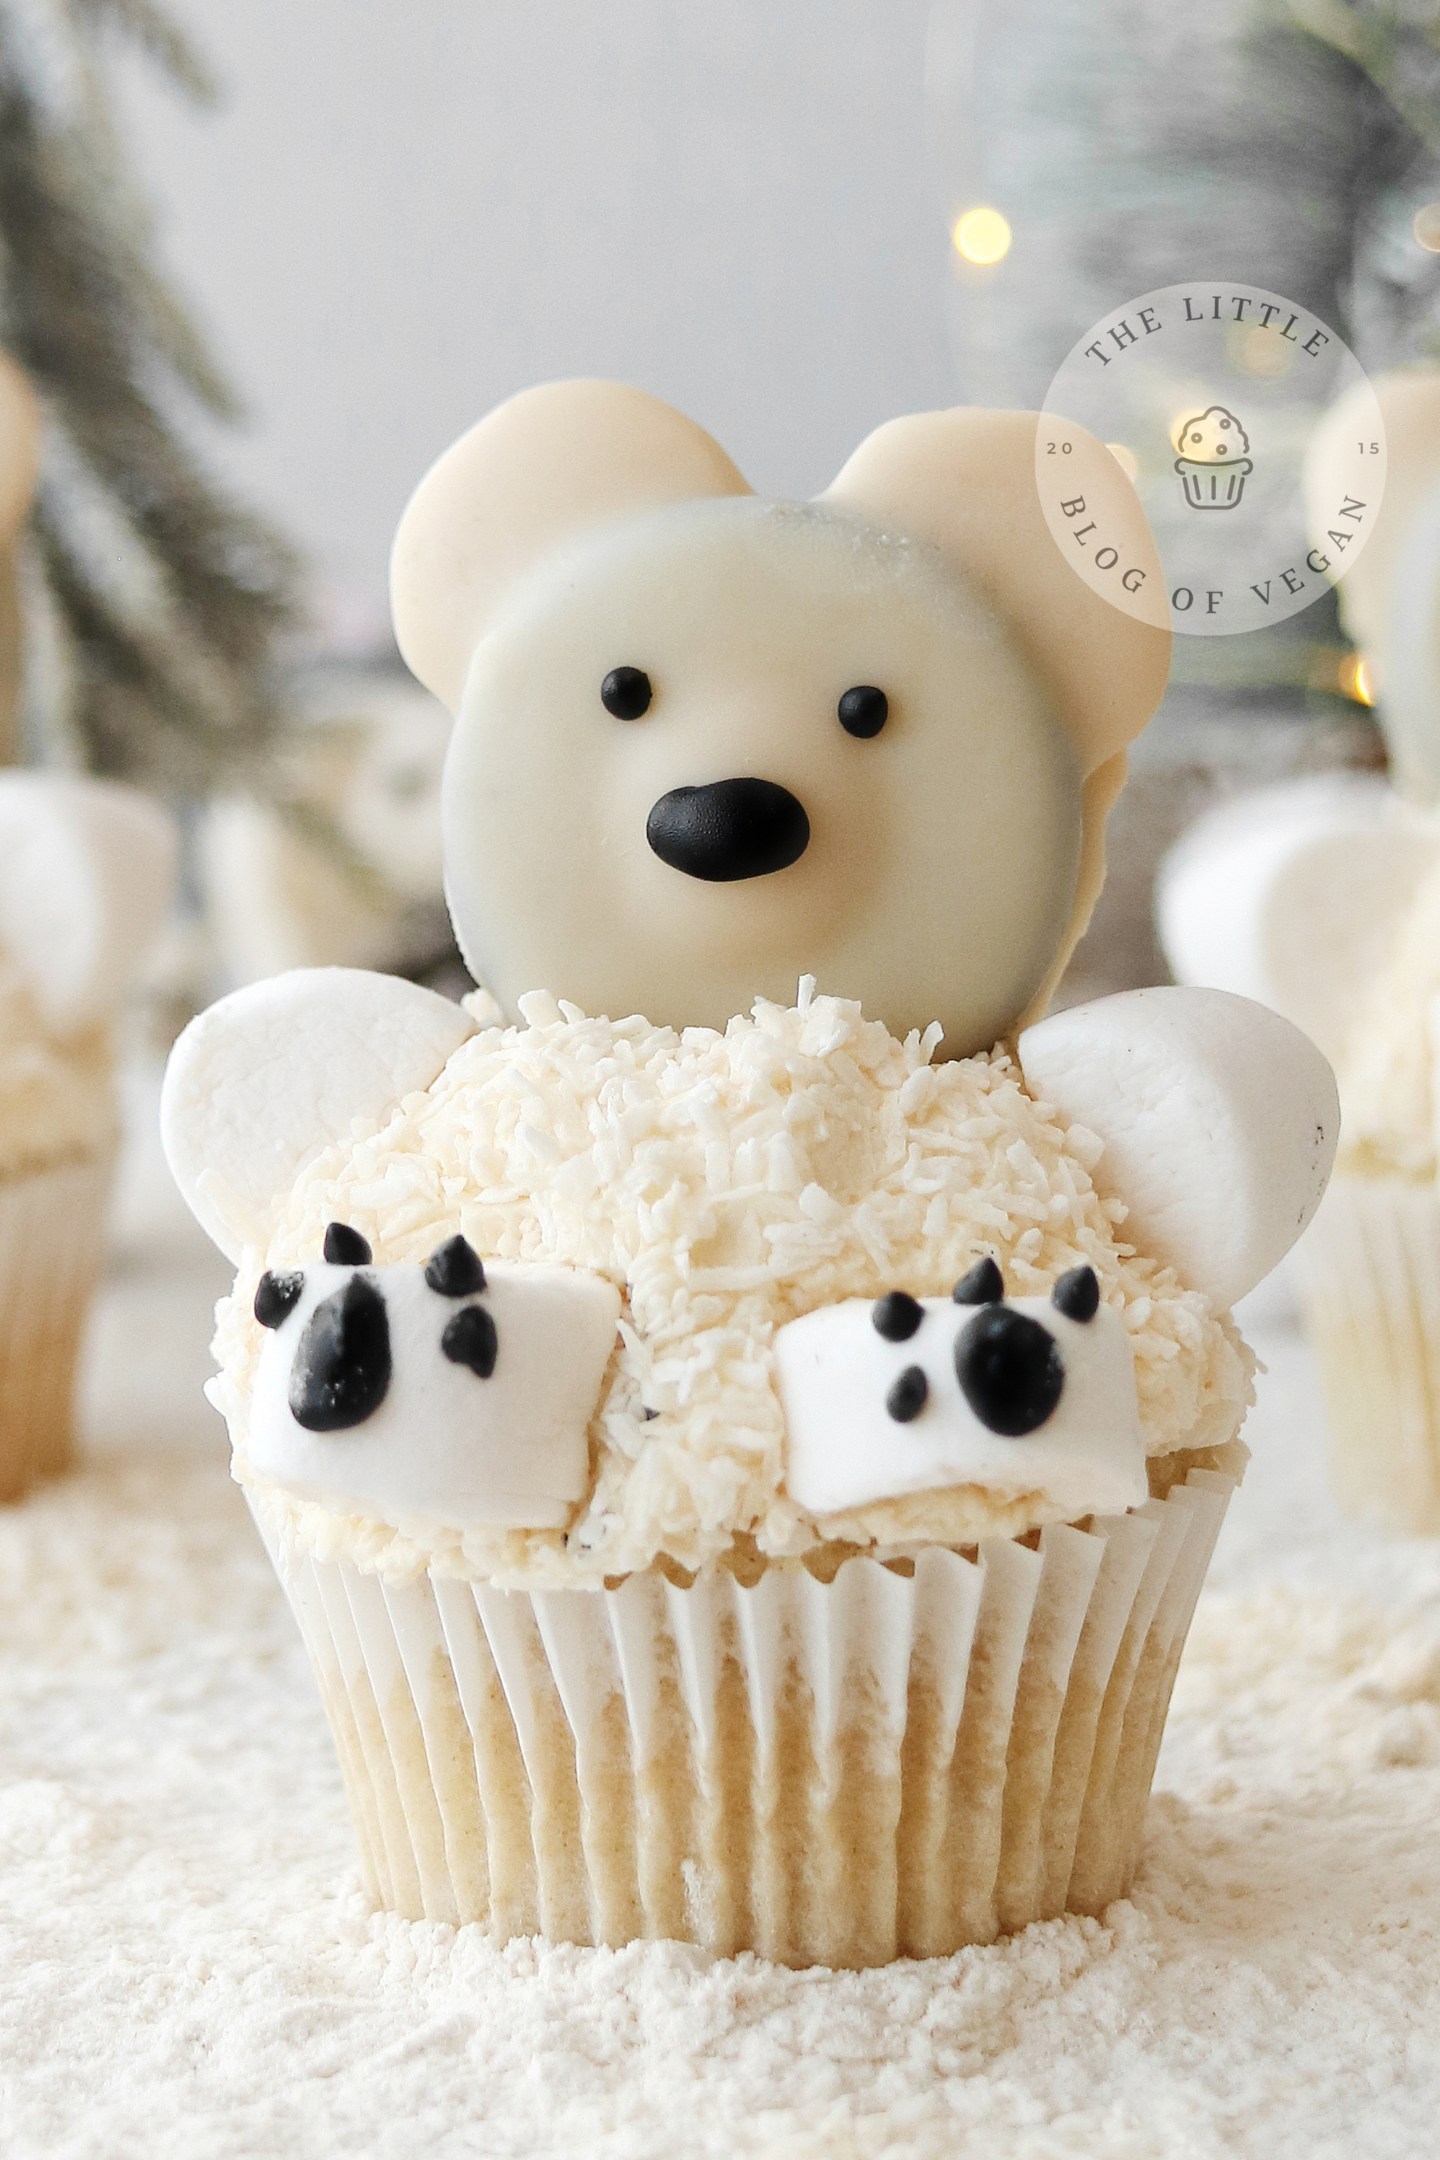
How to make a Polar Bear Cupcake?
Firstly, you’ll need THE BEST vegan chocolate mousse recipe, and I have it covered! The mousse contains 2 ingredients – silken tofu and chocolate. Go all out and add a splash of orange extract / flavouring to make it a festive chocolate orange mousse. It really elevates it to another tasty level!
Secondly, you will want a delicious brownie for the base. This brownie recipe features flaxseed which makes for an ultra chewy brownie, which compliments the softness of the mousse perfectly!
Thirdly, white chocolate! I used dairy-free white chocolate to create the 3d effect of the nose and ears. Whilst the chocolate is still wet, sprinkle over dedicated coconut. Not only does it taste yummy, but makes the polar bear look super realistic.
Lastly, COCONUT! Polar bear’s are fluffy, so what better way to replicate that than with desiccated coconut. Whilst the buttercream is still wet, use your hands to press desiccated coconut absolutely everywhere. I used a little bit of buttercream on the back side of the nose, so it helped it stick on, and pressed in the giant chocolate buttons either side of the ‘head’.
To make this polar bear extra special for the festive season, I decorated him with a little party hat. This hat is made out of an ice-cream cone, coated with buttercream and rolled in festive sprinkles. It’s a really fun way to incorporate some colour into this bake!
I use Sweetapolita ‘Christmas Non-Pareils’, which is 100% vegan friendly. Check them out here.

I am so excited to have collaborated with a true inspiration of mine, Kim Joy.
Kim Joy is an incredible baker and lovely friend, who was a finalist on The Great British Bake off 2018.
Kim Joy has been a huge inspiration to me and my baking journey. I remember seeing her kawaii bakes on GBBO! Our style is definitely similar which is amazing!
We decided to do a fun and special Christmas collaboration over on Instagram. We both have a love of baking cute, kawaii themed bakes, so it felt only right we did a polar bear!
In Kim Joys new book ‘Celebrate with Kim Joy‘, it features a stunning polar bear bombe (photo attached below). Isn’t it phenomenal!
I love the little hat and fondant details.
I tried to create mine as close to hers as possible whilst adding my own, personal touch. I used dairy-free white chocolate for the ears, and coloured buttercream for the face details.
I am so happy with how both of them turn out. It was just so fun to collaborate with such a baking hero of mine!


Check out Kim Joy’s reel video here.

Looking for more polar bear inspired recipes? Look no further:


I hope you enjoy this recipe as much as I enjoyed making and decorating it! It went down a storm with friends and family, so I’m sure whoever you serve this to will be highly impressed, and will definitely want a second slice – haha! Happy Baking.


Chocolate Mousse Polar Bear
- Total Time: Overnight
- Yield: 1 large cake 1x
- Diet: Vegan
Description
Learn how to make a delicious chocolate polar bear mousse cake, with a brownie base and desiccated coconut.
Ingredients
Ingredients for the mousse
- 600g of silken tofu
- 300g of dairy-free dark chocolate
- 1 teaspoon of orange extract / flavouring (optional)
Ingredients for the brownie
- 2 tablespoons of flaxseed + 4 tablespoons of water
- 70g of dairy-free butter/margarine
- 80g of caster sugar
- 80g of light brown sugar
- 50g of cocoa powder
- 1/2 teaspoons of baking powder
- 100g of self-raising flour
Ingredients for the buttercream
- 150g of dairy-free block butter
- 180g of icing sugar
- 1 teaspoon of vanilla extract
- 40ml of aquafaba (chickpea brine)
- Black food gel
Decorations
- Desiccated coconut
- Vegan festive sprinkles
- 1 ice-cream cone
- 200g of dairy-free white chocolate
Instructions
Method (chocolate mousse)
- Line one dome cake tin with grease proof paper. Click here to check out the exact tin I used. Use only one tin to create a half sphere.
- Place the dairy-free dark chocolate into a glass bowl. Fill a small saucepan 1/4 with water and place on the hob over low heat. Place the bowl on top and allow the chocolate to melt. This creates a bain-marie.
- Drain the water from the silken tofu carton, then add the tofu into a high speed blender. Drizzle over the melted chocolate and orange extract / flavouring (if using). Whizz up on high speed until fully combined and smooth. As the mixture is quite thick, you might need to stop and scrape down the sides of the blender a few times. If the mixture is too thick, add a splash of water to get it to a blendable consistency. You want it thick enough to be able to hold in the dome shape, so don’t add too much water.
- Pour the mixture into the lined dome tin. Tap the tin on the worktop a few times to remove any trapped air bubbles.
- Place the tin into the fridge overnight to chill. Before removing from the tin, place it into the freezer for 20 minutes. This makes it much easier for removing.
Method (brownie)
- Preheat oven to 180 degrees c fan, and line a 8×8 inch square baking tin with grease-proof paper. You basically want a tin large enough so you can cut out the circle for the base of the mousse dome.
- Make the flax eggs. Add 2 tablespoons of ground flaxseed into a small bowl and add in 4 tablespoons of water. Stir to combine then set aside to thicken. This will take around 10 minutes.
- In a large mixing bowl, add in the dairy-free butter/margarine, both sugars and flax ‘egg’. Whisk to combine until light in colour.
- Add in the cocoa powder, baking powder and flour. Mix until a thick brownie batter.
- Spoon then spread the batter into the lined tin, making sure to get it as flat as possible. Smooth out with the back of a spoon or offset spatula.
- Place the tin into the oven and bake for 30 minutes, or until a skewer inserted into the middle of the brownie comes out clean.
- When the brownie is ready, remove from the oven and allow to cool. You want to cut the brownie whilst it’s still slightly warm, as when it’s cold, it will crack.
- Place one of the dome cake tins over the brownie and use force to press down so it cuts the brownie into a circle. This will make sure the mousse will fit on the brownie perfectly. Alternatively, run a sharp knife around the side of the tin to get a clean cut.
- Set aside.
Method (white chocolate decorations)
- Add the dairy-free white chocolate into a heat proof bowl. Fill a medium sized saucepan 1/4 full with water. Place the saucepan on the hob over low / medium heat, and add the bowl on top. This creates a bain-marie. Allow the white chocolate to melt and cool very slightly.
- Transfer the white chocolate into a piping bag, and pipe large circles on some grease-proof paper. Two large for the ears and a smaller circle for the nose. Watch the tutorial here.
- Whilst the chocolate is wet, sprinkle over some desiccated coconut.
- Transfer into the freezer until ready to use.
Method (buttercream)
- In a large mixing bowl, add in the dairy-free butter and whip until creamy. I use a stand mixer with a balloon whisk attachment, a hand mixer will work great too.
- Sift in the icing sugar and vanilla extract. Whip until creamy. The buttercream will be very thick.
- Pour in the aquafaba and whip for 5 minutes until it turns light and creamy. Don’t over whip it or it can become too soft. If it does, just add in more icing sugar until it’s thick and creamy. If it splits, keep whipping, it will come together.
- Your Swiss meringue buttercream should be thick, very creamy and silky smooth. If it feels too heavy, add chunks more butter / splashes of aquafaba until its very light.
Assemble.
- Place the brownie circle on a cake stand or plate.
- Carefully remove the mousse dome from the cake tin, and place on top of the brownie base.
- Using an off set spatula, spread a layer of buttercream all over the brownie base and mousse dome. Be very careful as you don’t want any of the chocolate colour in the white buttercream.
- While the buttercream is tacky, press desiccated coconut all over the dessert.
- Spread some left over buttercream on the back side of the chocolate nose and stick onto the middle of the cake.
- Press the white chocolate ears either side of the dome, so they stick.
- Colour any left over buttercream with black food gel, transfer into a piping bag and pipe two eyes and a nose. Watch the tutorial here.
Notes
What vegan white chocolate to use?
I used Sainsbury’s own Deliciously Free From White Chocolate. Vegan / dairy-free white chocolate can sometimes be oily / grainy, its best to search for your best local dairy-free white chocolate. Another i highly recommended is iChoc Vegan White Chocolate.
What is aquafaba?
Aquafaba is the water from a can/tin of chickpeas. The chickpea water or brine as it’s called, acts as an amazing egg substitute for cakes, cupcakes and delicious meringue buttercream. You can also get aquafaba in a carton for easy use. Check it out here.
What vegan block butter to use?
My favourite vegan / dairy-free block butters are ‘Naturli Vegan Block’ or Flora Plant Based Block Butter Alternative (salted or unsalted).
To store
Store in the fridge. Best enjoyed 3 days of making.
- Prep Time: Overnight
- Cook Time: 30 minutes
- Category: christmas recipes
- Method: Baking
- Cuisine: Christmas recipes


I liked this recipe, it was difficult to frost so I said forget it, poured the coconut flakes on top and then waited till the morning to add the hat. Instead of food gel I used blueberries as I try to avoid any dyes, preservatives and shoot for low sugar or coconut sugar instead.